Sephora

Stores & Services
Find a Sephora

Happening at Sephora

View all

Services

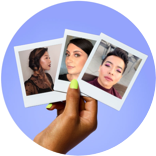
From makeovers to personalized skincare consultations

Free Classes

Get inspired, play with products & learn new skills

cancel
Showing results for 
Search instead for 
Did you mean: 
Post in Beauty Confidential

DIY Beauty

I didn't know where to put this, so maybe this can be where people post DIY beauty?

(DIY lip balms, skin care, candles etc.) 


I recently scraped out leftover wax from my beloved 3-wick BBW candle "Lavender" and "Midnight Blue Citrus." Melted it into a new smaller candle. 


mycandle9.jpgmycandle1.jpg

mycandle5.jpg3wickcandle2.jpg

I like how this saves me a lot of unused wax 😄 And there's the fun of mixing scents. 

Re: DIY Beauty

Here's a few DIY recipes for the winter ❄️❄️❄️


I ❤️ DIY skincare because

  • you perfectly customize your skincare for you!
  • it's relatively affordable and accessible, even when everything's organic
  • if you are on a no or low-buy kick, this is an easy way to try new products
  • you can stick to biodegradable products, reuse containers, and make very small batches, reducing environmental waste
  • they make meaningful gifts
  • I think it's very human to work with your hands and create things
  • it's fun!! 😄


Easy Energizing Face Mask


  • Bentonite clay, a heaping spoonful of
  • Matcha powder, a smaller spoonful
  • Orange blossom water or any floral water
  • Optional unfiltered honey, 1 drizzle

Makes one mask

Mix a little floral water into the clay and matcha until you have a nice consistency that's easy to spread on your skin. You may need less water than you think so go easy on it! Drizzle in some honey if you'd like a little moisturizing and stir. Leave on your face until the mask has dried and then wash off. I like to pat an essence in immediately after.

Soothing Moisturizing Yogurt Mask


  • Full-fat organic yogurt, 1-2 heaping spoonfuls
  • Unfiltered honey, 1 dollop
  • Ground oatmeal, a spoonful

Makes one mask

Mix ingredients and pat on face. Leave on for 15 minutes or so and rise off.

Winter hand salve


  • coconut oil 25 ml
  • shea butter 30 ml
  • optional 5ml of specialty oil like rosehip oil, argan oil, just remove 5 ml from one of the oils above
  • beeswax, 5 grams
  • optional essential oils, just a few drops
  • glass jar or aluminum tin that can hold 2 oz
  • toothpick

Makes roughly 2 oz of product

Melt the oils and beeswax together in a water bath and stir with a toothpick. You can remove glass jars to let them cool or put ice cubes in the bath to cool down the bath before removing the tins. Do not try to remove the tins while the water is hot or you may hurt yourself! One the mixture has cooled a little but is not starting to solidfy yet, add the essential oils and stir again. Remember, the coconut and shea have their own scent so try to pick an EO blend that's complimentary.

has anyone made their own setting spray, body powder? I'v...

has anyone made their own setting spray, body powder? I've ordered some ingredients to try

DIY Beauty

Great thread! A few months ago I decided to open an Etsy store whichwould primarily be antique compacts and the like which I would clean and then fill with DIY products or store bought products. I ran into a creative block though, so everything is on hold until late August when my block usually lifts. It's weird but every year for many years I'vehad a creative block from January until August. I tried hard to overcome it this time but no luck. Anyway it was fun to learn about DIY makeup. One of my favorite ingredients is mango butter because I love mangoes. Iwas experimenting with essential oils and pigments too. TKB was a good find. That's my story! Here's one of the little compacts to be used for lip balm or solid perfume.

null

Re: DIY Beauty

Hi everyone!

I ended up pressing my loose bare minerals shadows and the turned out great! I think I'll get much more use out of them now. I thought I'd include my process/experience details here because it seemed like the most logical thread for it, just in case anyone else wants to press their shadows.


I did some research on YouTube and Google before pressing. You need a binding agent for mineral shadows. A lot of videos used fractionated coconut oil, jojoba oil, or a combination. Jojoba expires faster from what I saw but I ended up using Jojoba oil (I got mine from Trader Joe's) because it was easier to find in my area. I also used rubbing alcohol (based on my research, if your pans will rust, use at least 70% or more). I highly recommend doing a test or 2 (or 3) of a shadow you don't care too much about so you practice. I am by no means an expert so you might want to watch some videos to get a feel for the process.


I had two casualities during my pressing project, one was because it was a matte and one was because I added WAY to much rubbing alcohol (use a dropper or a spray bottle; don't try to pour it out of a bottle...it doesn't end well). All the videos warned me that mattes do not press well, but I had to try for myself. I had 2 (I think) a lavender and a dark blue. The dark blue I pressed seemed fine when I pressed it but when I picked it up after letting it dry to move it to the zpalette it cracked into pieces. I saved what I could and tried again but it fall into pieces again. I think the only thing I did differently with the lavender was I may have added more oil and/or pressed harder. It kind of makes sense because mattes are usually drier and more densely packed. I wouldn't recommend pressing any mattes that you love, just in case. You might be able mix some shimmer from another in with it to help, but I didn't try that.


What you need:

Spoiler
- Rubbing alcohol 70% or more
- Fractionated coconut or jojoba oil
- Loose pigment/shadows
- A dropper tool or two (I cleaned and reused one from a DS I had)
- A mixing tool (a de-potting tool or any item with a small spoon-like shape. I used a metal cuticle tool)
- Paper towels
- A pressing tool (I used another pan and a lid for a deluxe sample that was the right size)
- Pans (I got mine on Amazon)
- A small dish

Instructions:

Spoiler
1. Personally, I wiped all my pans down and the stirring tool, etc. with rubbing alcohol first just to make sure it was sanitized. Lay a placemant or paper towel or something down because it will get messy.

2. In a small dish, add the pigment. Then add 3-6 drops of Jojoba oil (depends on the amount of shadow, the texture of the shadow, and your preference), and rubbing alcohol 5 to 10 drops (or more depending on your preference. It will evaporate so it mostly depends if you want a watery or paste-like consistency to put it in the pan. I preferred more paste-like so I could easily scoop the pigment into the pan and not have to press as much to get the moisture out.)

3. Mix it all together adding more rubbing alcohol as needed until desired consistency. (Some of my shadows absorbed/ evaporated the alcohol faster than other, so don't be surprised if you have to add more or less to different shadows.)

4. Then put the mix in the pan and layer a paper towel or 2 on top and press it gently using your pressing tool until you see some of the moisture absorbed by the paper towel. Gentle pull the paper towel up and move to a dry position of the paper towel; some pigment will transfer to the paper towel.

5. Repeat this process increasing the firmness of the press as the mixture get less fragile until the paper towel is no longer damp and there is little to no pigment transfer (it will vary depending on the pigment texture and the amount of rubbing alcohol you used in your mixture). I noticed that with some of my shadows, it was hard to tell if it was damp or just cold from the evaporating rubbing alcohol, so I aired on the side of curious and pressed a few more times.

6. When you pressed as much moisture as possible out, press firmly a few more times; I recommend something you can really press down with (this is where I used the DS lid because it gave me more to hold on to).

7. In between shades, wipe off the dish and stirrer with a paper tool.

8. Depending on the brand, you might be able to pull the sticker with the shade name and put it on the back of the pan. If you can't, I'd just keep track and make a cheat sheet later.

9. Finally, let the shadows dry completely before use; I left them a few days. I use a dry paper towel to wipe off any pigment on the bottom of the pan so my zpalette didn't get too messy.

That pretty much sums it up. Like I said, I'm not an expert but the steps above seemed to work for me. Good Luck!

I'll try to add a picture later; it doesn't want to upload for some reason.


RE: DIY Beauty

This is a cool thread! I have been wanting to try making my own sugar scrub but haven’t done it yet. Anyone have a recipe that they have personally used? There are some tips on Pinterest that I have come across but I’d like to know first hand if it’s worth the trouble of making my own. Is it really moisturizing??
AnonymousInsider

RE: DIY Beauty

@ChristinaFL2001 I mix sugar or salt with coconut oil and honey. Or just honey, I triedit both ways and it hasnt broken me out. I also like to add few drops of lavender oil.

I read long ago to mix brown sugar with orange juice, but...

I read long ago to mix brown sugar with orange juice, but I don't think that's a very stable product that would last in a jar!

Re: DIY Beauty

I love this idea and the thread idea @MSena! Does anyone have any ideas on how to repurpose old eyeshadows? I'm looking for ideas to reuse some old loose BE eyeshadows. I was thinking about putting them in candles or soaps or something but need to do some research. I need to get them out of my collection.

Re: DIY Beauty

@Lazybeautybeast This may not be the most practical way, but here's another DIY idea for eyeshadows/blushes : new nail color 😄 


Screen Shot 2018-01-12 at 7.15.26 PM.png

Old Milani blush/highlighter that lost its cover. 


Screen Shot 2018-01-12 at 7.15.32 PM.png

Crush them gently into fine powder (put them in a plastic baggie and smoosh)


Screen Shot 2018-01-12 at 7.15.37 PM.png

Mix up a small amount of the powder with a tiny dollop of clear polish, and voila, new nail color. 


It's a bit of a hassle to get the perfect ratio of mixing powder, but super fun. I usually try this with an old shadow + top coat that's running low. 


AnonymousInsider

Re: DIY Beauty

Fabulous idea @MSena!  I love this DIY! 

Re: DIY Beauty

@Anonymous I'd love to see other people's DIY too, since I remember some of the ladies make their own make up 😄 

AnonymousInsider

Re: DIY Beauty

@MSena,

You and others are so creative here. I will be taking notes on everyone's ideas. 🙂

Conversation Stats
  • 12 replies
  • 1202 views
  • 41 Hearts Given
  • 8 Contributors
Photos8
  • mycandle9.jpg
  • mycandle1.jpg
  • 3wickcandle2.jpg
  • mycandle5.jpg
  • Screen Shot 2018-01-12 at 7.15.37 PM.png
  • Screen Shot 2018-01-12 at 7.15.26 PM.png
  • Screen Shot 2018-01-12 at 7.15.32 PM.png