Services
From makeovers to personalized skincare consultations
From makeovers to personalized skincare consultations

Get inspired, play with products & learn new skills

Exciting launches, parties & more

Explore what's hot in your store

Ask questions, join challenges, and get recommendations from people like you

Discover topics tailored to your beauty interests
Add your photos and get inspired by fellow beauty lovers

View activity, savings and benefits
Redeem items, samples and more
View and track online orders
Reorder it from in-store and online purchases
View saved products
Recommendations from your store visits
Manage your services, classes and events
Complete your beauty traits for personalized recommendations
Payments, contact info, addresses and password
 Sign In
View activity, savings and benefits
Redeem items, samples and more
View and track online orders
Reorder it from in-store and online purchases
View saved products
Recommendations from your store visits
Manage your services, classes and events
Complete your beauty traits for personalized recommendations
Payments, contact info, addresses and password
Ask questions, join challenges, and get recommendations from people like you
Discover topics tailored to your beauty interests
Add your photos and get inspired by fellow beauty lovers
From makeovers to personalized skincare consultations
Get inspired, play with products & learn new skills
Exciting launches, parties & more
Explore what's hot in your store
Welcome everyone to BICU Thread! The only university that's pretty much accept all, serve all. (That's right, there's a 100 percent acceptance rate. )
WHAT IS BICU?
miss ya @JeffreyBD
For a mini masterclass, posting styles suggested are:
The goal is to have a well of personalized info that can be drawn from whenever. Following social media can be helpful, but it's also nice to have real person tips and tricks.
Quick Ombre Lip Step by Step
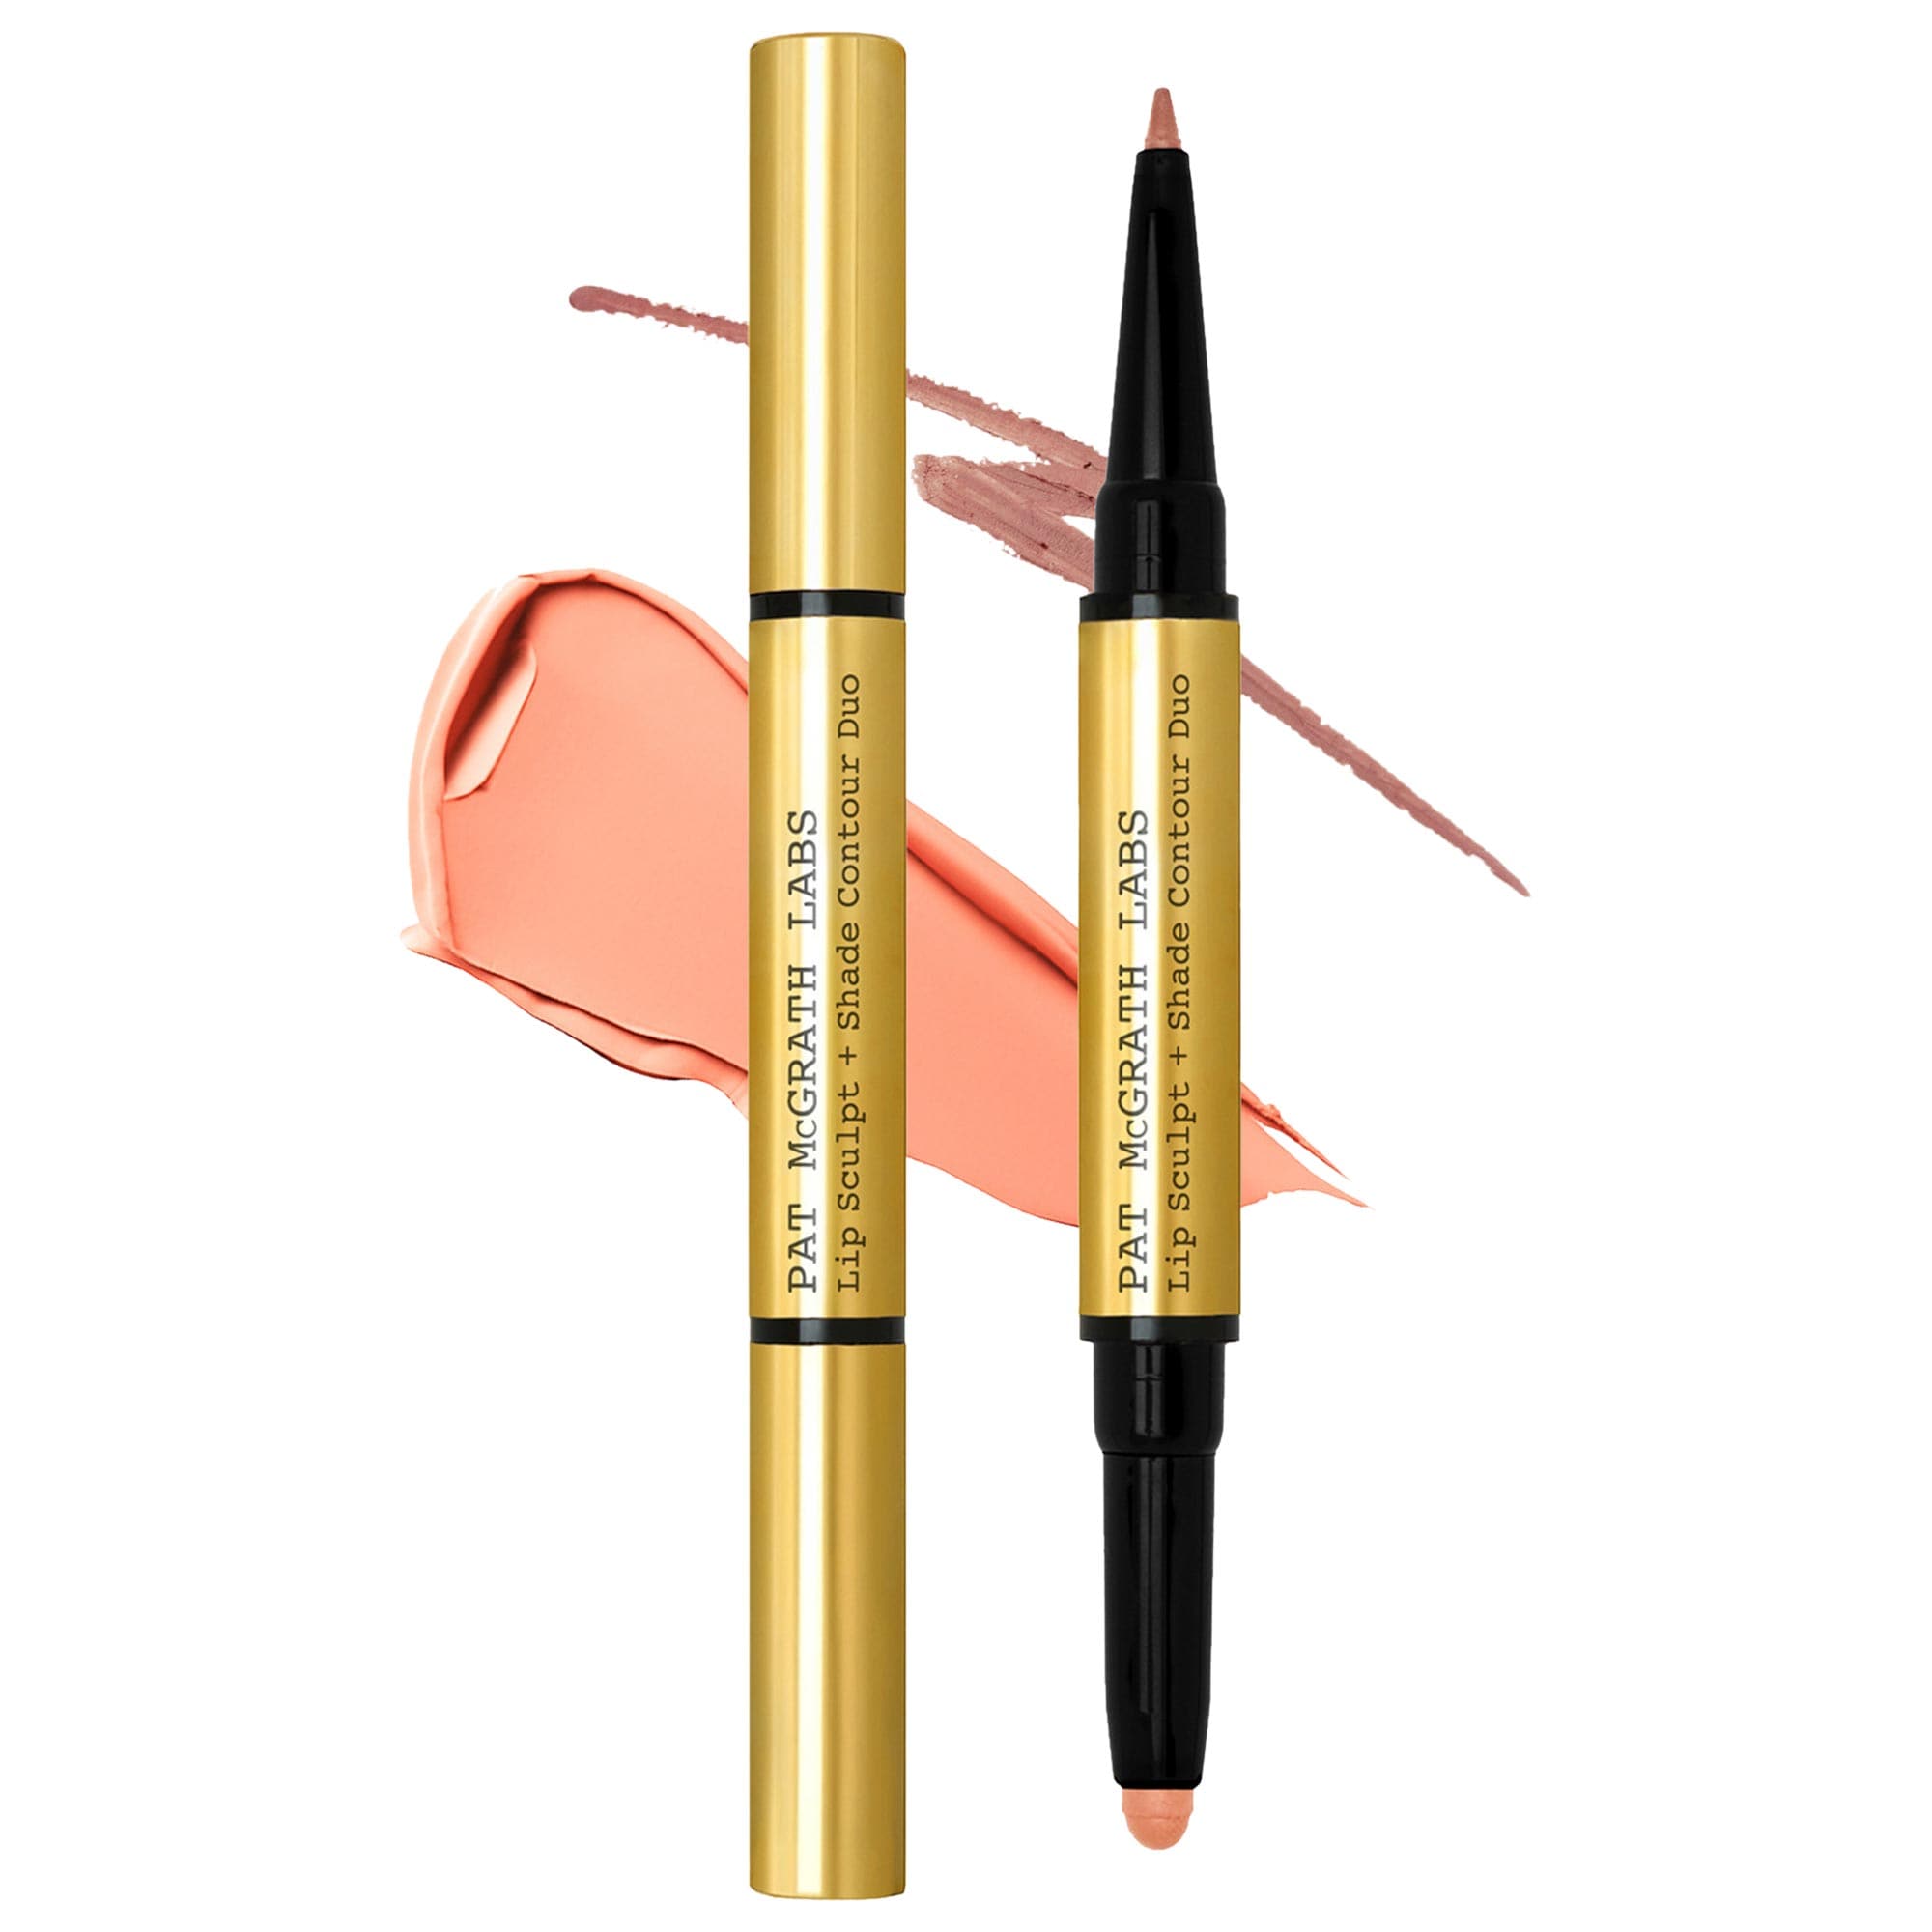
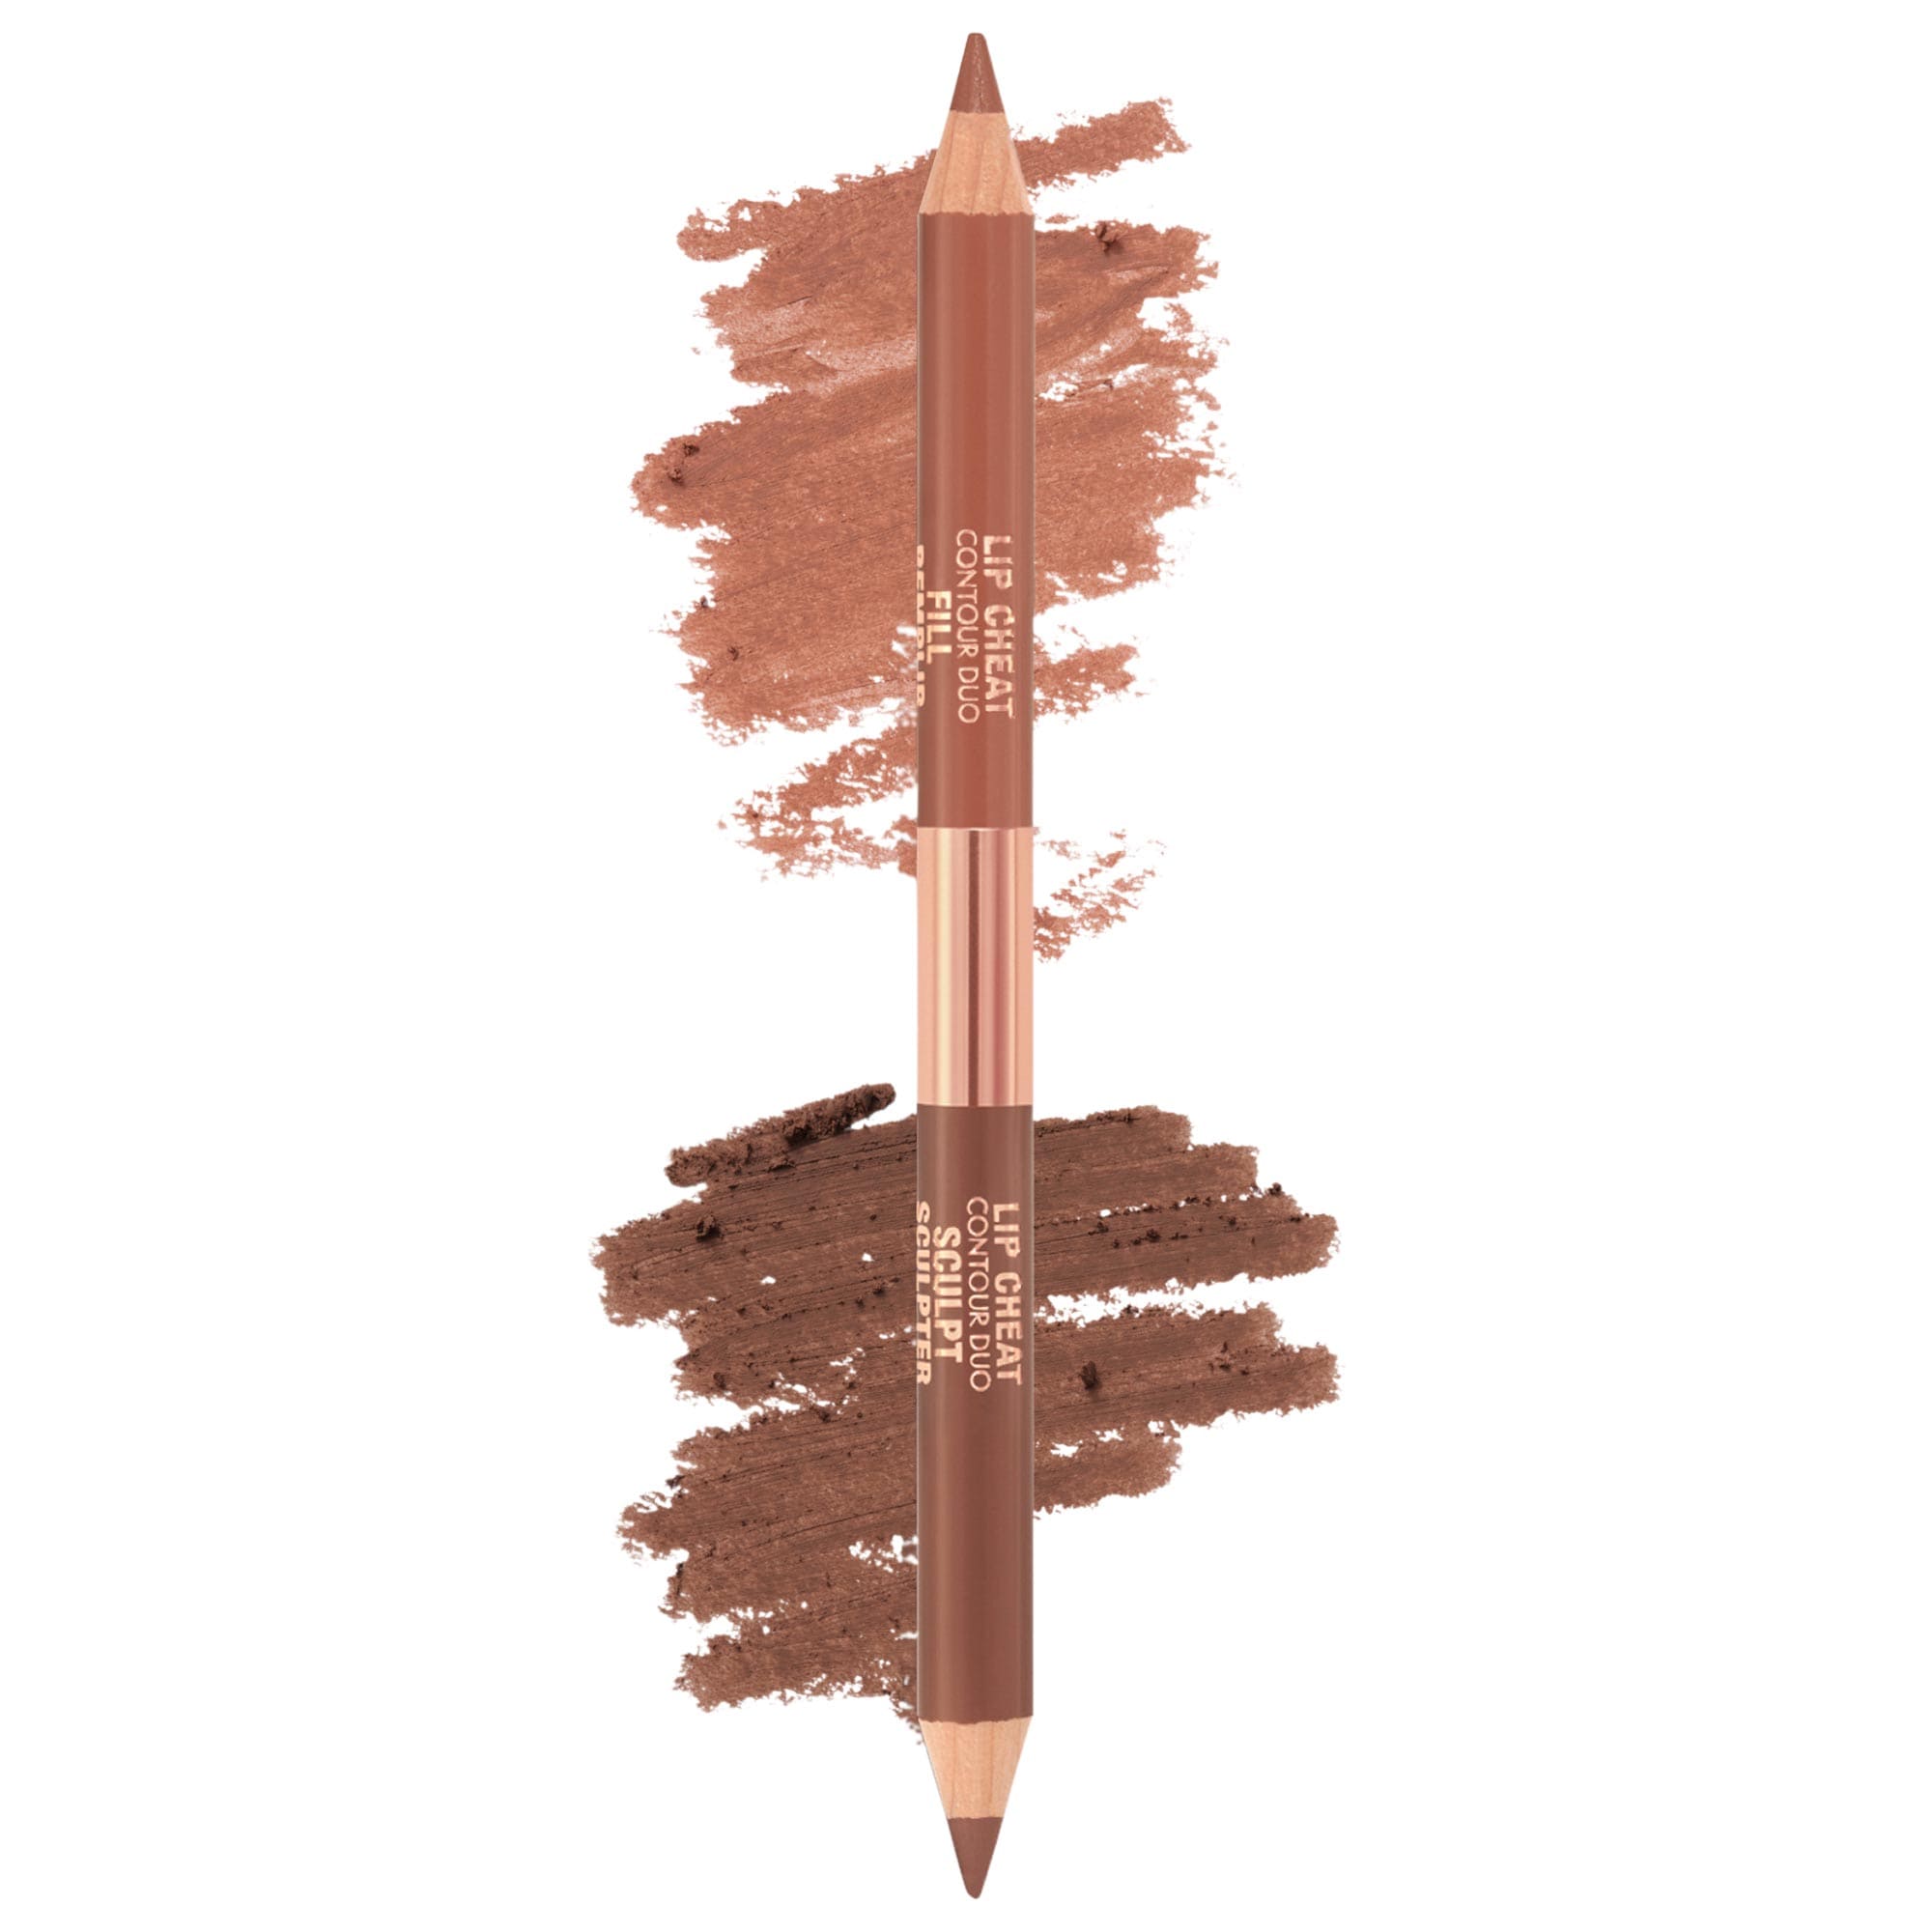
This was in a marketing email for the new PAT McGRATH LABS Lip Sculpt + Shade Lipstick and Lip Liner Contour Duo
I love the going back in with the liner/last step
Anyone else have quick tips for a ombre lip?
Thanks for sharing this 🙏
I think the guide is helpful and simple enough that I feel inspired to maybe give this a try. 👄 @danielledanielle
Ombre and Poutsicle lip trends look so good in ads etc... I have been kinda curious too give it a go myself.
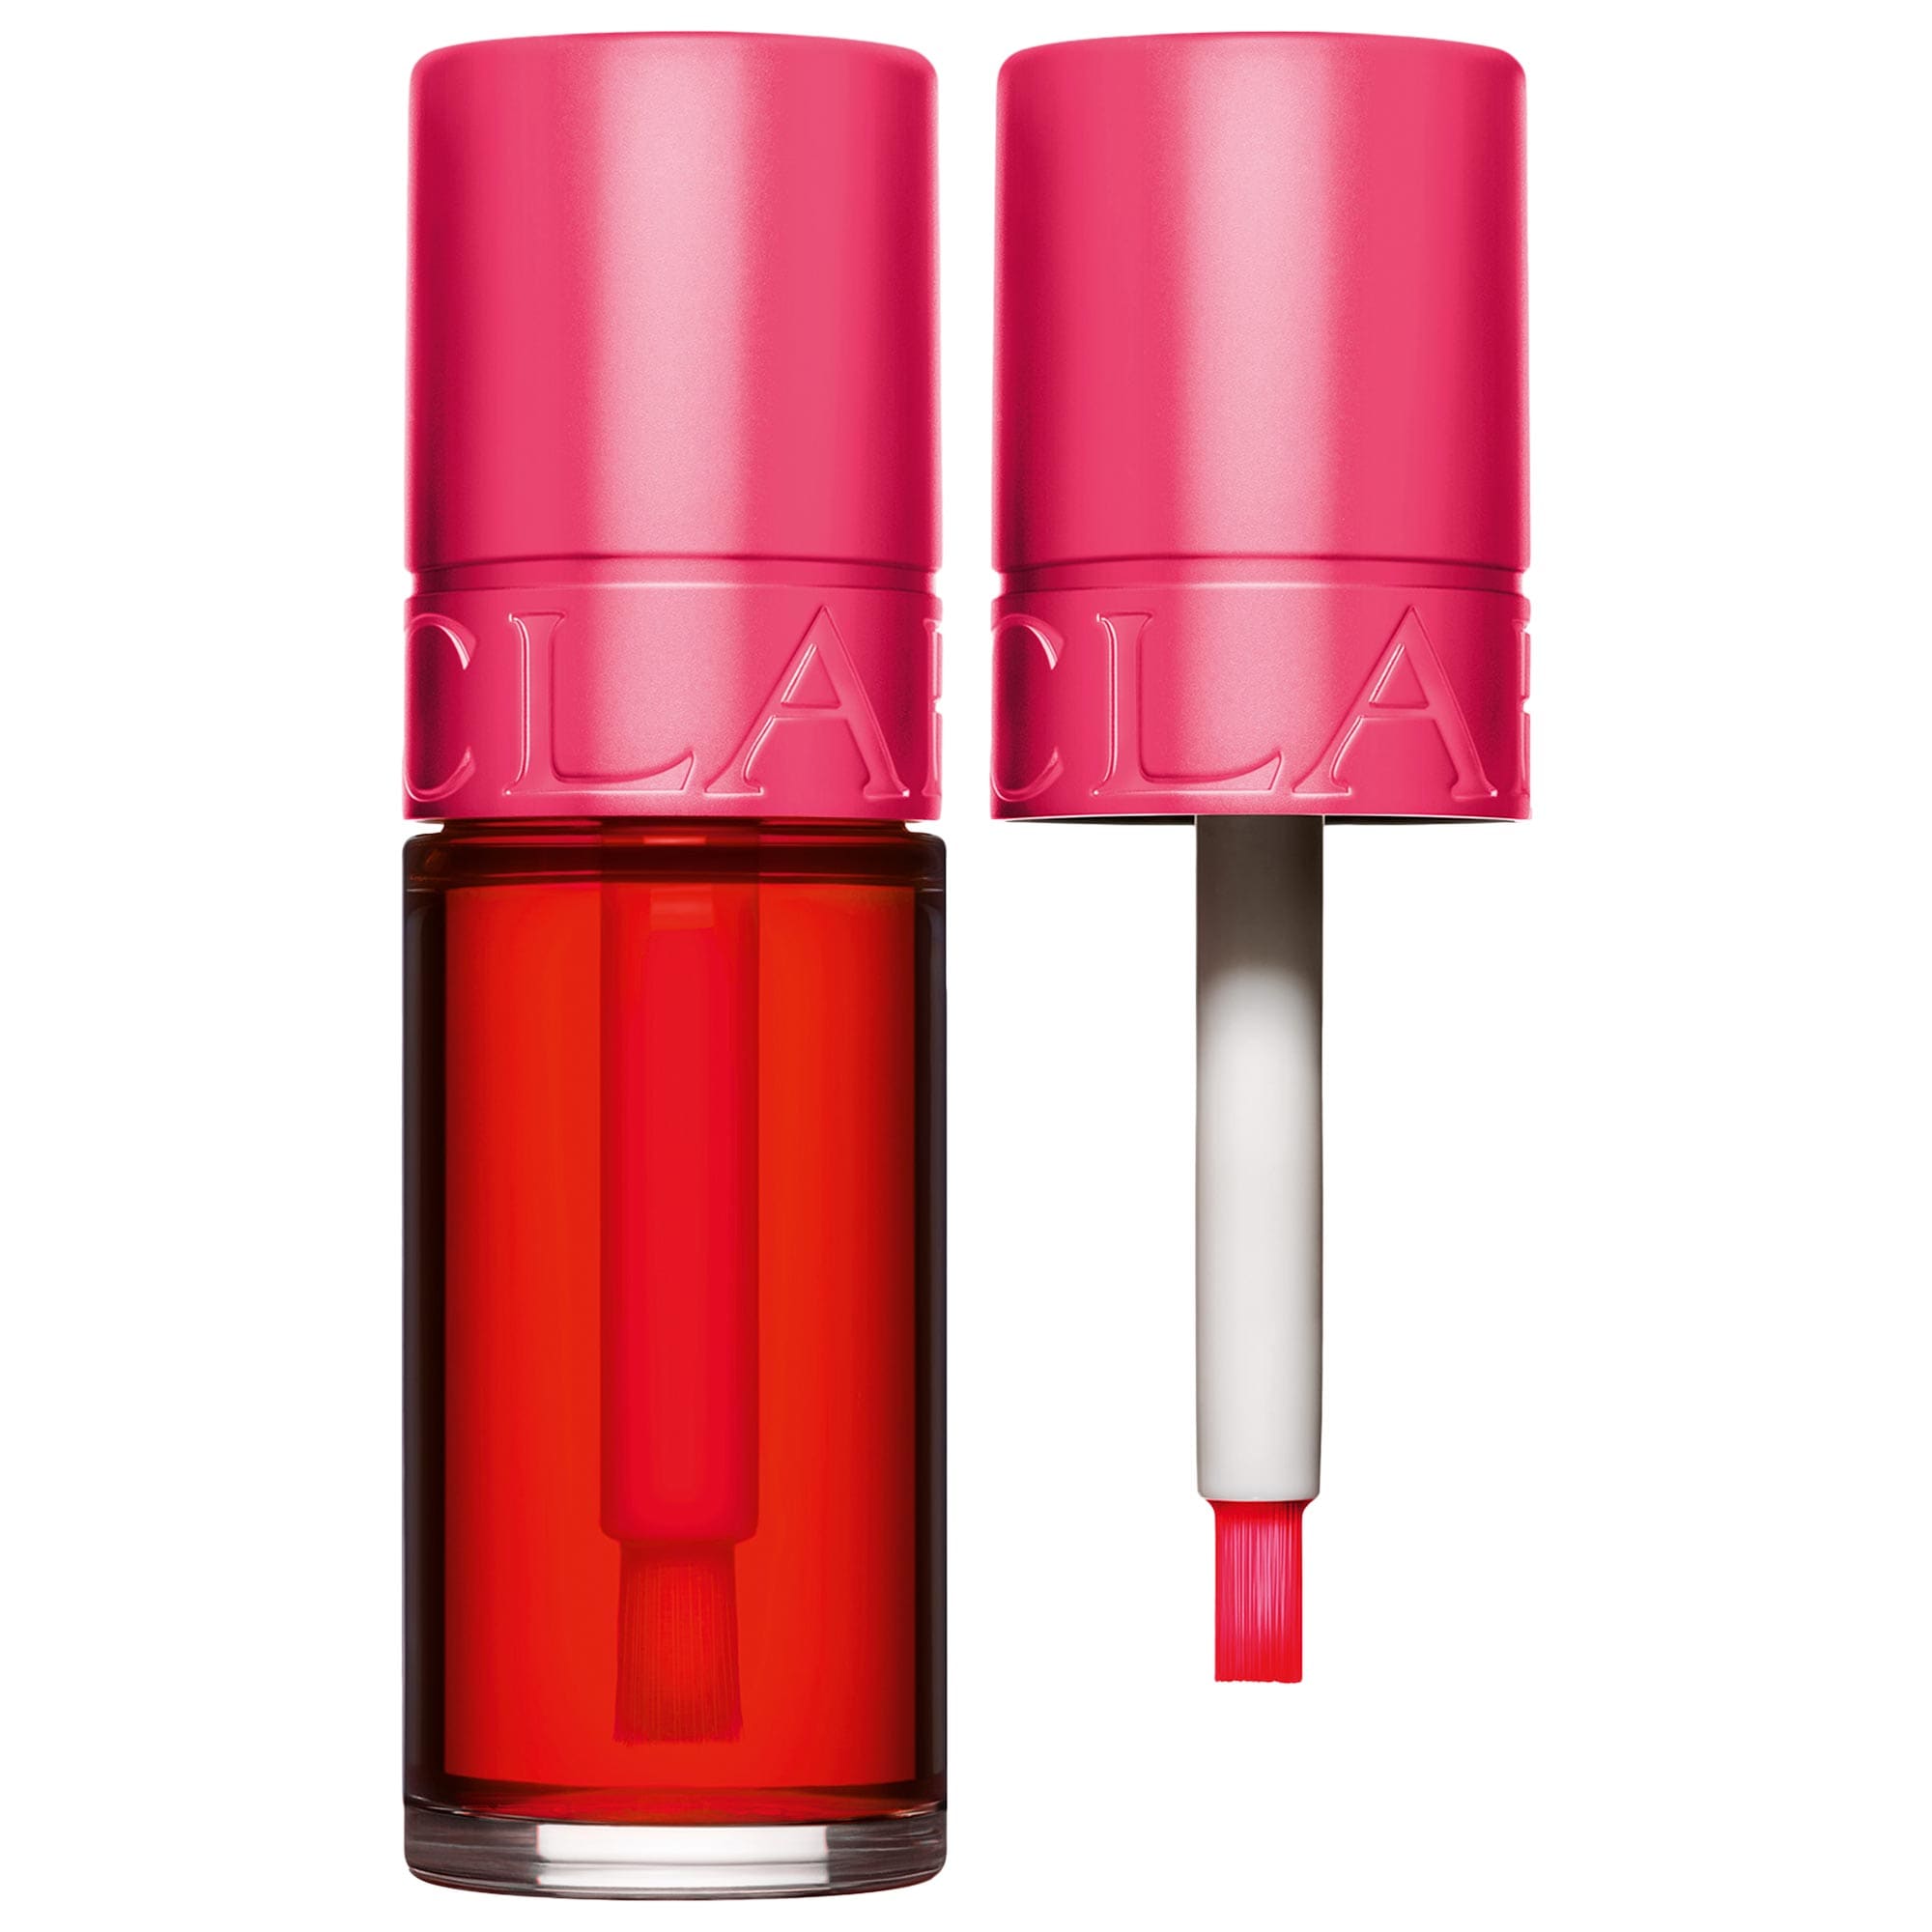
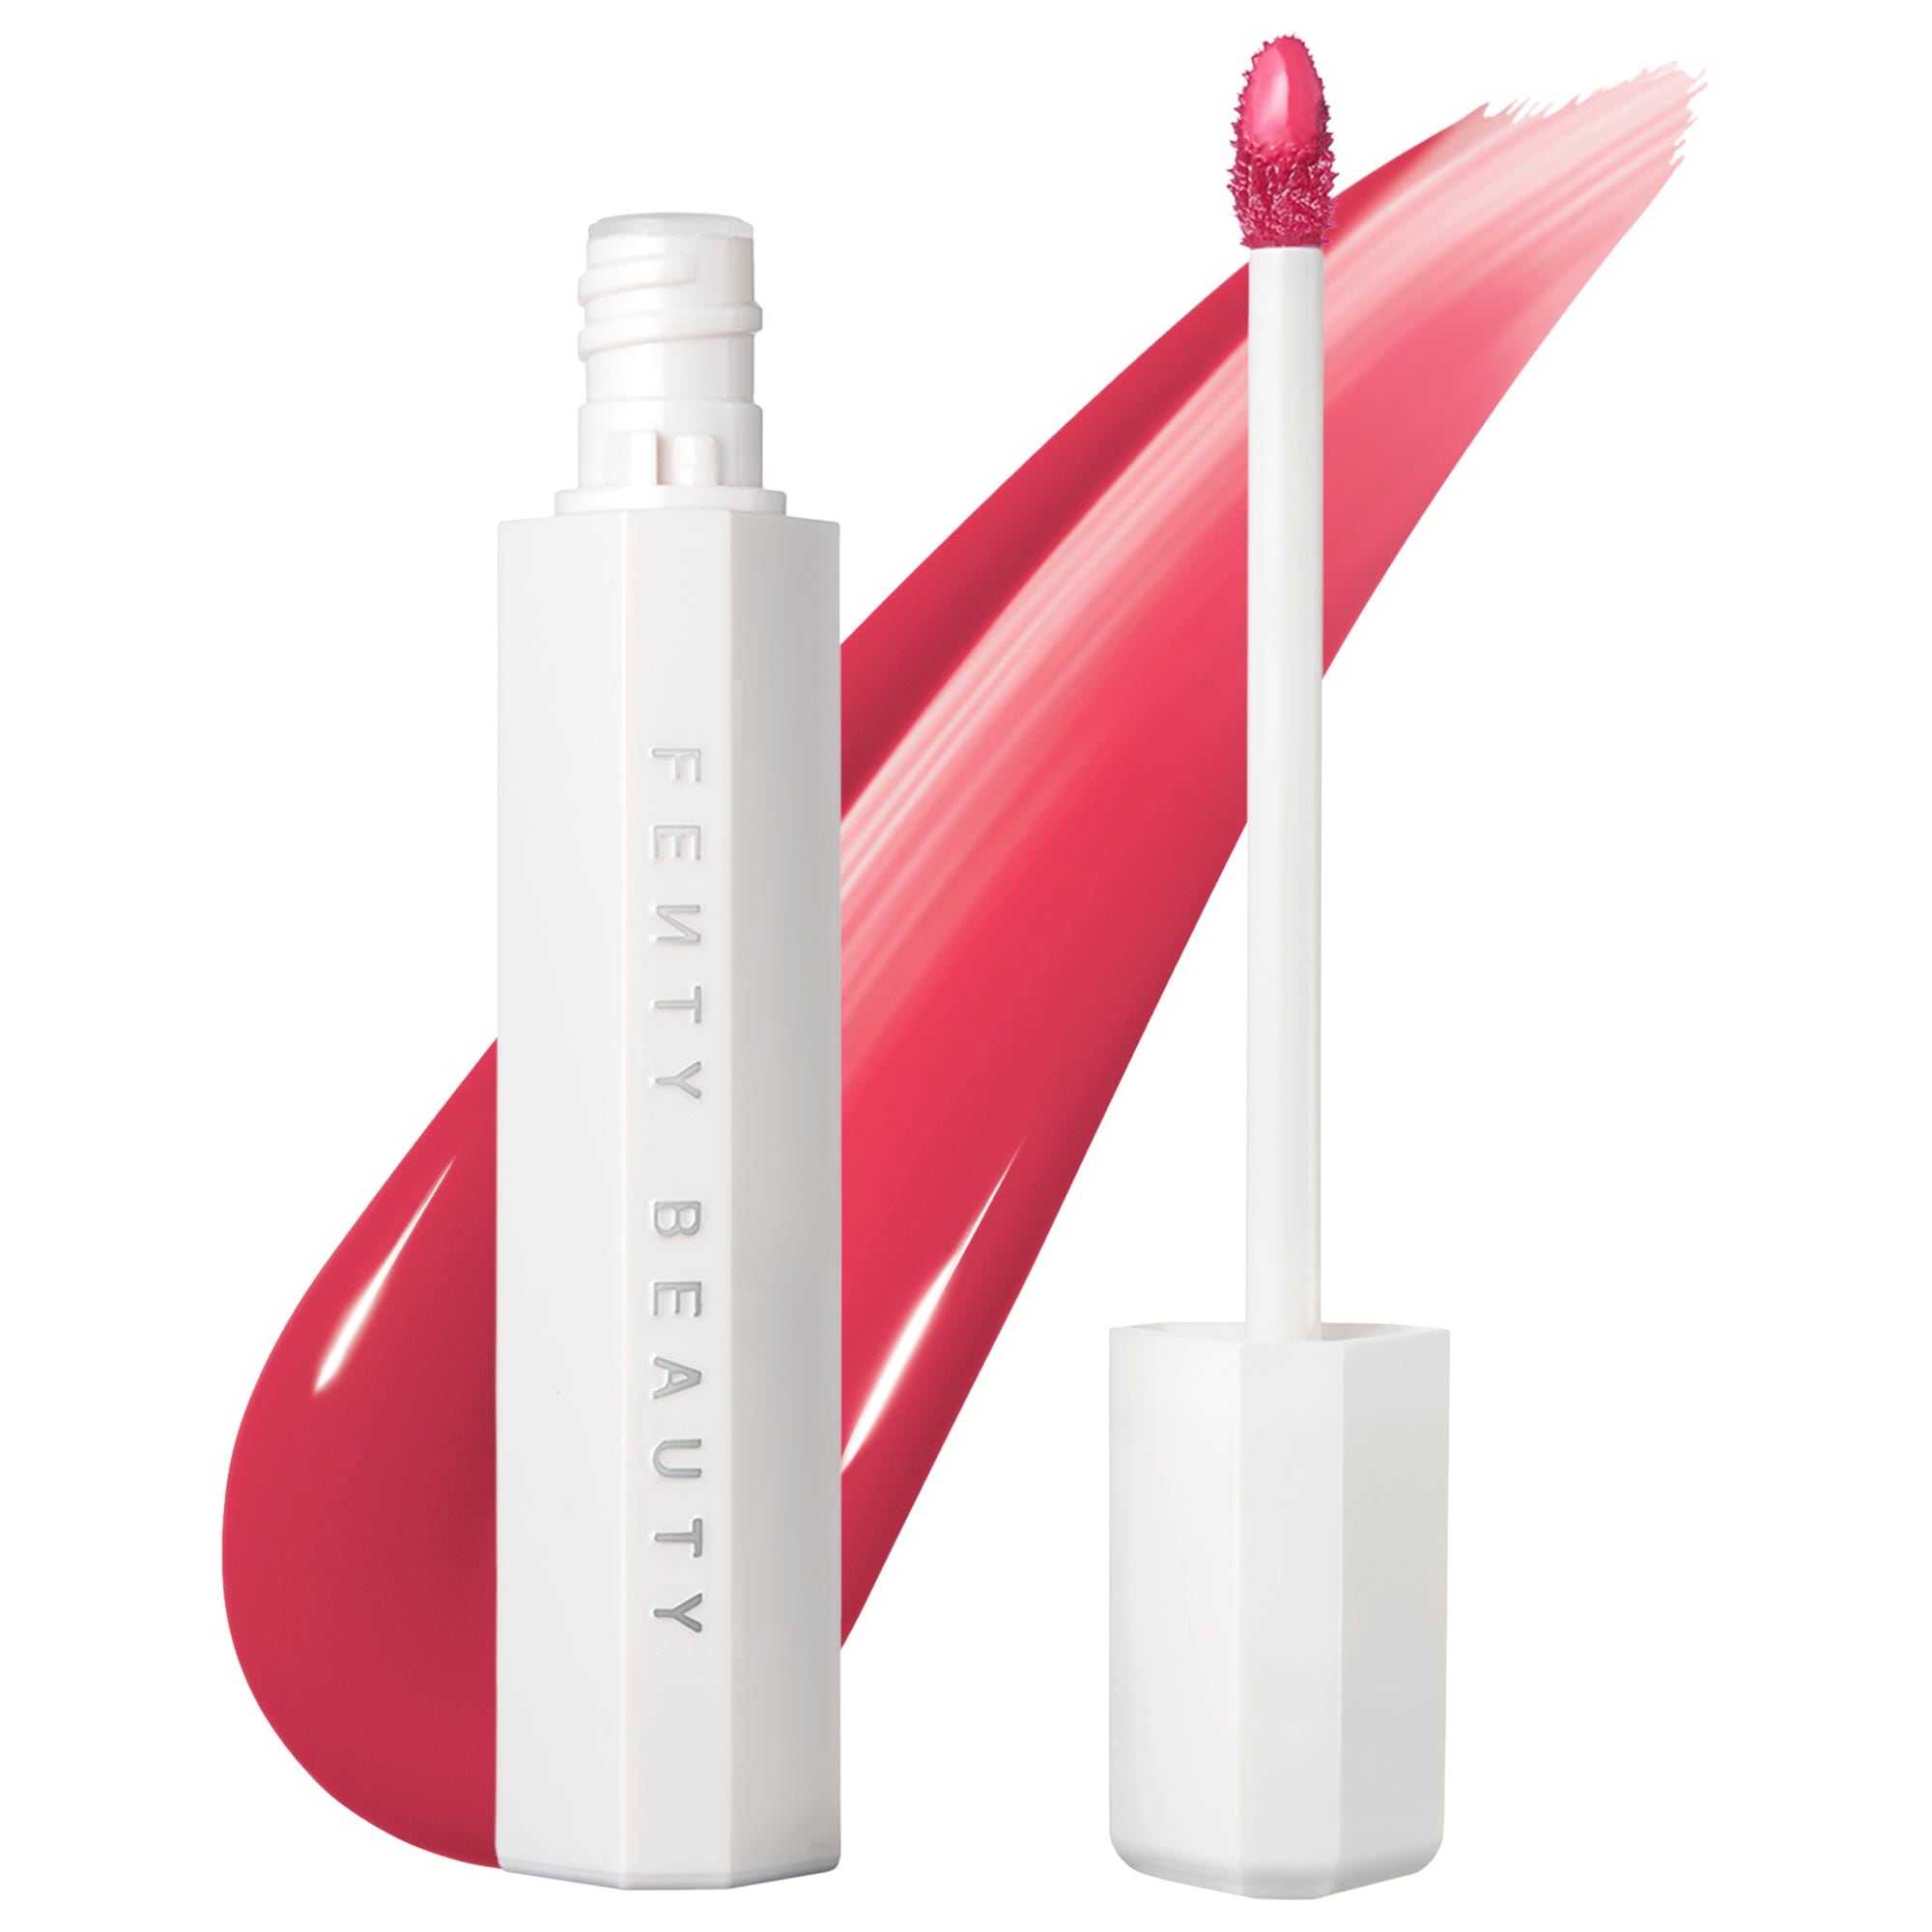
I really should @danielledanielle thou I kind of already do this technique with my lip tints, sort of. (Clarins Hydrating Water Lip Stain Kiss-Proof & Matte Finish Rose Water Fenty Beauty by Rihanna Poutsicle Hydrating Lip Stain Mai Type )
I start by lining my lips then pressing them together, after a minute I lightly work the stain towards the center.
I like that step-by-step @danielledanielle. Will reference back to it when my PAT McGRATH LABS Lip Sculpt + Shade Lipstick and Lip Liner Contour Duo makes its way here.
I gave ombré lips a try, playing it safe to start with, going with more brown, nude tones for a more discreet ombre lip pairing my first time out.
Steps:
1. Exfoliate and moisturize lip - my lips are on the dry side so I sometimes do this the night before and moisturize my lips again as part of my lip prep.
2. Line lips with liner - I line all but the outer corners of my lips (but see Step 5, below) because mine are naturally darker in that area
3. Fill the rest of the lips with a lighter lip color
4. Diffuse & blend color and liner with fingers, lip brush or silicone lip "brush" - because my lips are on the dry side, I take the teensiest bit of balm, I literally just dab the pad of my finger onto the balm just enough to get some slip and then pat around the inner edges of my lips to diffuse and blend liner and lip color
5. (Optional): Lightly top center of lips (or all over) with a clear balm or gloss
6. Clean up work - clean up and soften the edges. I sometimes will take the liner and re-draw or deepen the line. Also, it's here that I line my outer corners.
Products Used:
Charlotte Tilbury Super Nudes Lip Cheat Contour Duo Lip Liner Tan - the shades on this liner duo are not the best for me (I prefer the Medium version but I've already used up that one) but this BIC U assignment has been a nice way to get more use out of it, so thank you, Professor @danielledanielle.
rhode Peptide Lip Treatment Nourishing Glaze - this is the passionfruit (limited edition) version that Rhode released spring 2023 that I'm trying to finish up before the end of this spring - 3 years is a little longer than what I aim for but c'est la vie. It is one of my favorite flavors/versions of her untinted lip treatments.
💋 First try, earlier this week: with gloss, used a heavier hand with the lip liner and lined my entire lip as part of Step 2, above.
 Step 2: Line lips, lined bottom lip 2x
 Step 3: Fill lips
 Steps 4 - 6: Diffuse, re-line and clean up
🎬 Take 2, Friday: with a balm, a softer hand; did not line the outer corners of my lips at Step 2, above.
 Step 2: line lips, all but outer corners
 Steps 3 & 4: Fill in lips with color & diffuse with smidge of balm
 Steps 5 & 6 - Line again & clean up work
@itsfi , that lip prep step is important. A matte lip will tell on you right away if you skip it 😂
Interesting to diffuse with the balm. I usually use our girl Fenty Beauty by Rihanna Fenty Treatz Hydrating + Strengthening Lip Oil and let it fade away with drinking water+toothbrushung, but I might try this with that, TY

@danielledanielle a lip oil + lip stain (for the liner) will work wonderfully for me for an ombré lip. I don't know what it is - user error (very likely) or my lips (also very likely), but using a lip oil or lip gloss, any brand or any look, ombré or otherwise, just ends up melding, blending all the colors together so there's no distinction between the liner and fill shade. It makes it look all smooth and pretty, like when I add a clear coat or top coat when I do / used to do ombré nails. But, I can't keep the distinction - even if I use a brush to precisely apply the gloss, it just migrates on my lips. Which, isn't a bad thing because I do love the look it gives but not quite ombré; that said, using a lip stain as a liner and letting it dry down seems to do the trick, and I can diffuse the color a little before that lip stain dries down.
I have to take just the smallest amount of balm to keep it from migrating and blending all the colors together as well but it's more doable (keeping the liner and color distinct for an ombré look) than with a gloss or oil.
Face mapping!
I've really enjoyed doing this over the summer.
Here's some base observations
I also like these images I've gotten for Pinterest
Face Mapping with blush
Not sure of the original, but contouring by face shape
Smashbox guide
@Titian06 's approach
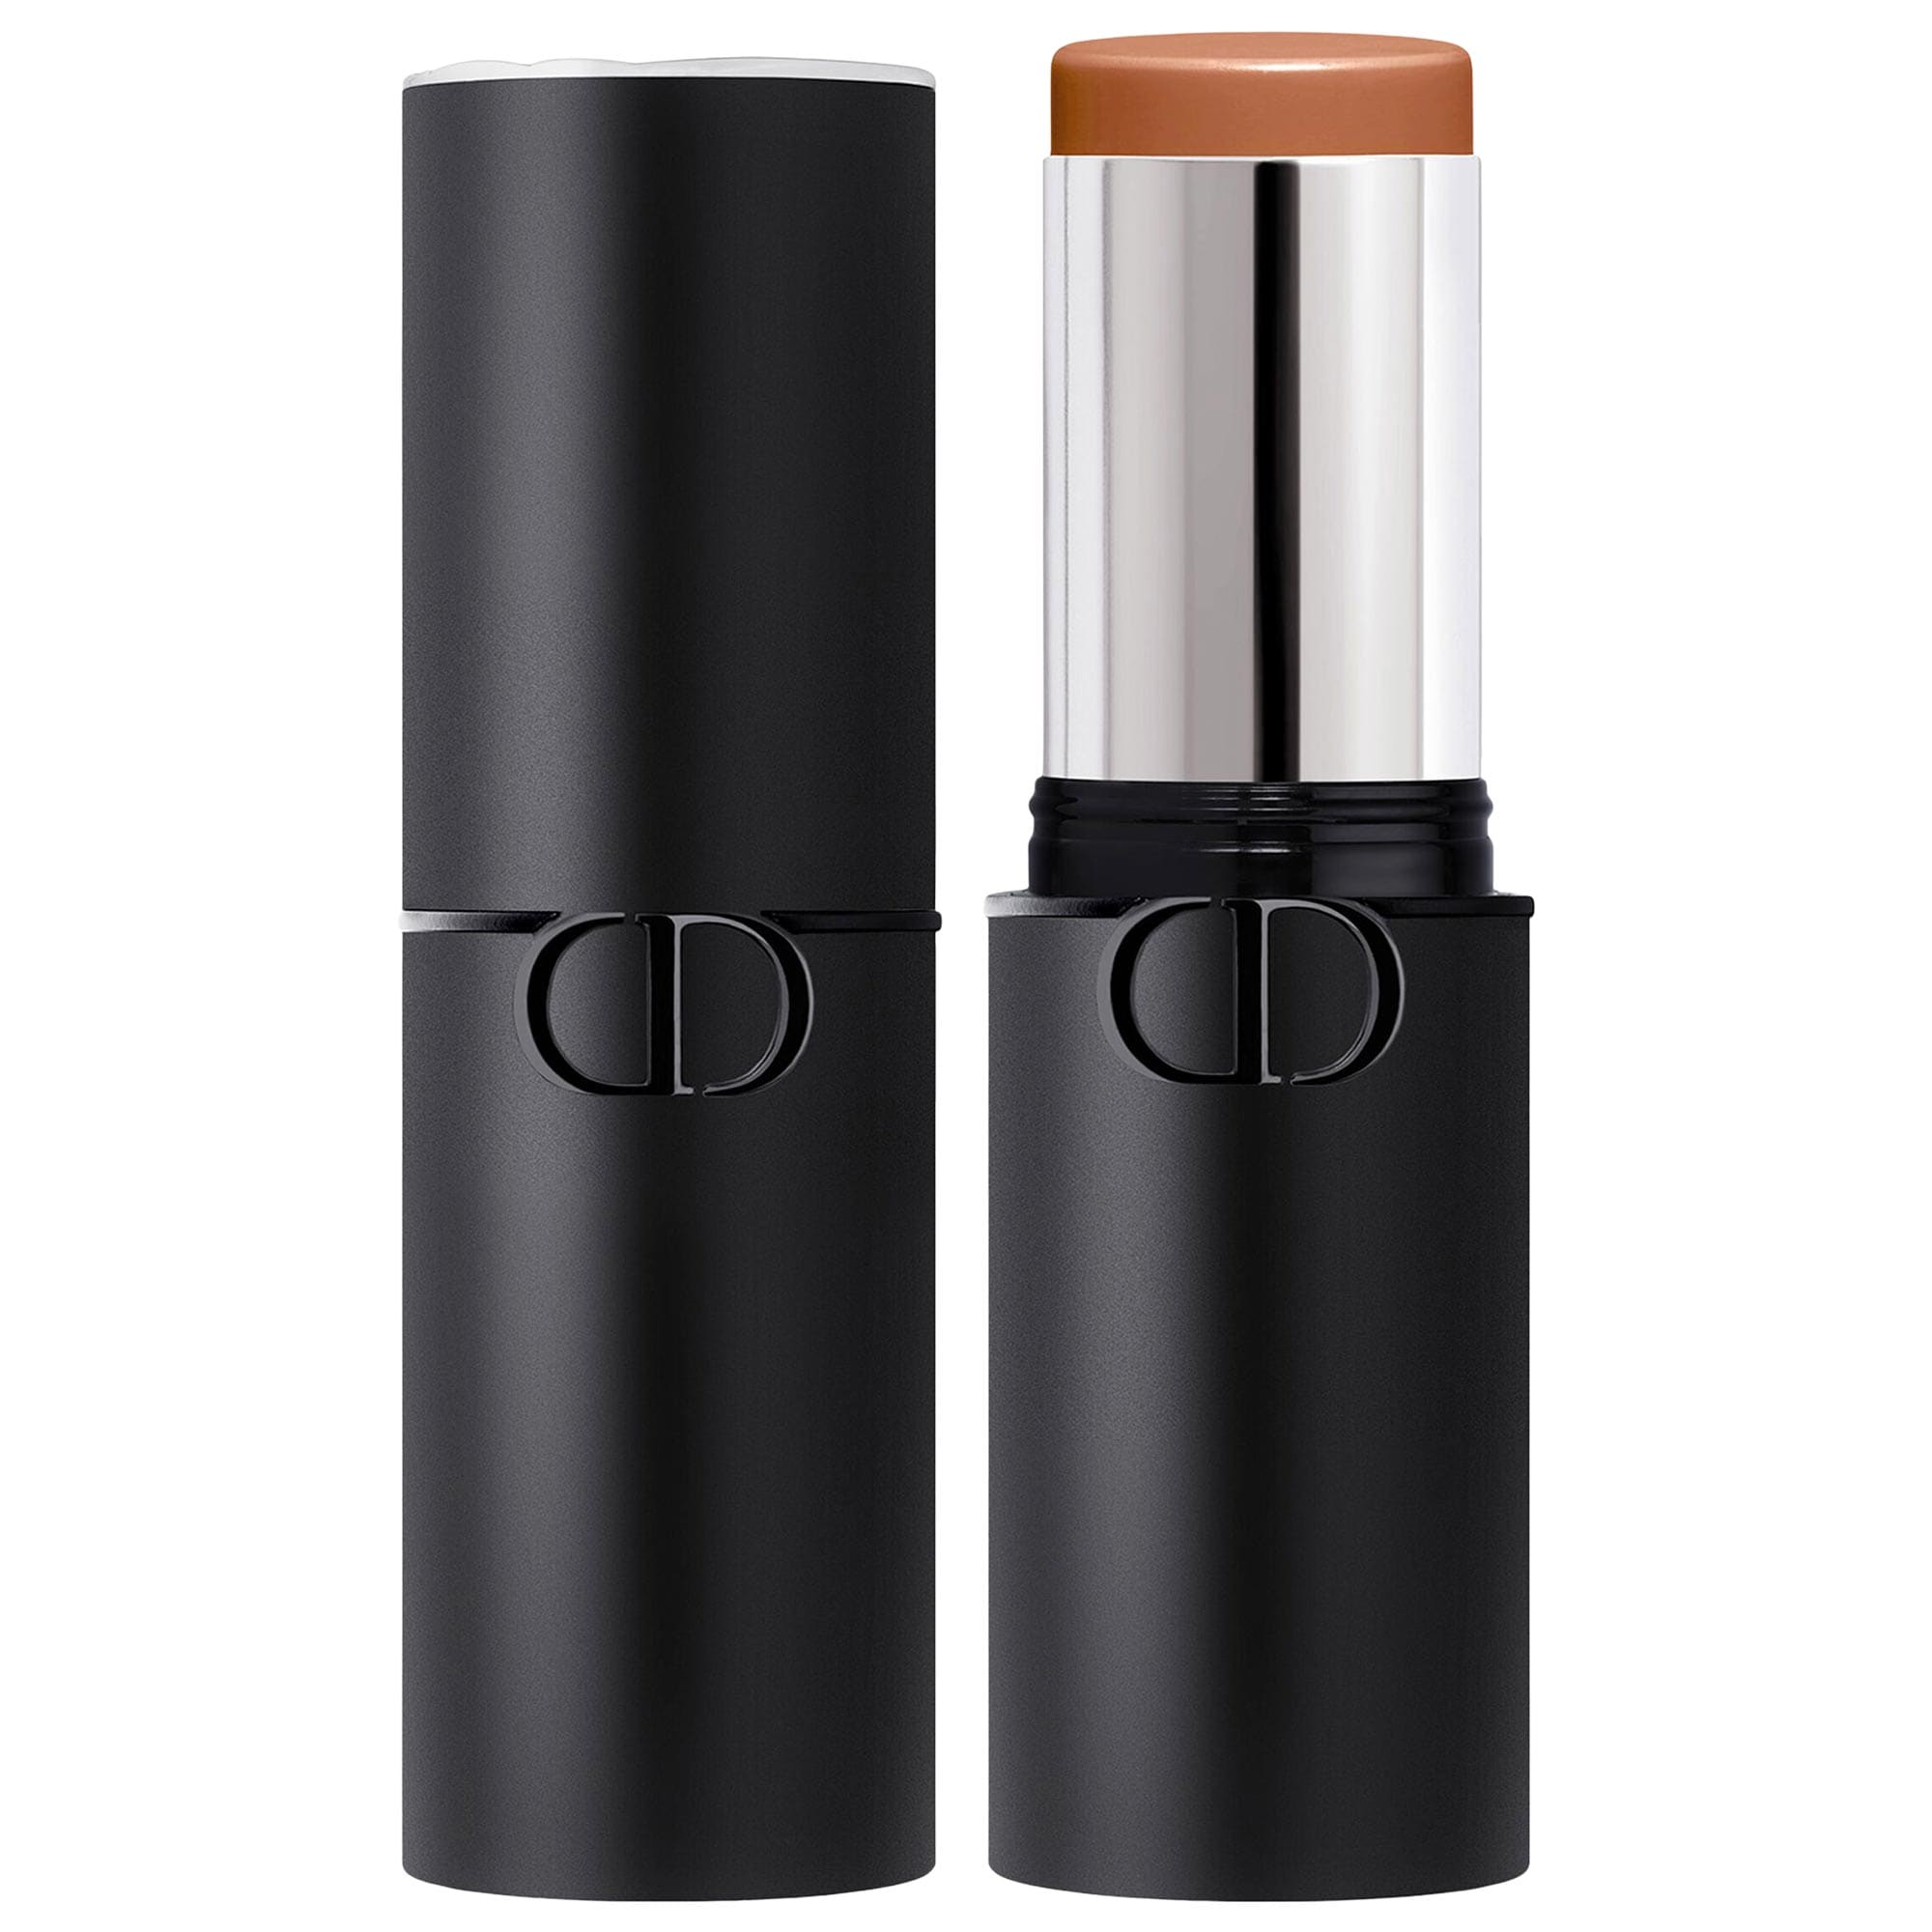
" I tried the lifted contour she talked about in her last post. I used PDXXXX's comments and watched a couple of Erica Taylor's posts. I used MAKEUP BY MARIO SoftSculpt® Transforming Skin Perfector Medium as my contour. Using Erica's placement method, I held my index finger from my ear angling to the top of my upper lip. I applied the Skin Perfector with the product on my finger in a straight line above my finger using it as a guide. I then used a brush to blend it out and up, not down. Above that on my cheekbone, I applied Westman Atelier Baby Cheeks Lip + Cheek Cream Blush Stick in Mimi, blending out, mostly up, a little into the contour so there was no distinct line, and also onto my temple with a brush. For my highlighter, I used Saie Glowy Super Gel Lightweight Dewy Multipurpose Illuminator Starglow dotting above the blush and on my temple, blending out with a brush above and into the blush and onto the temple."
👇🏽link to post
👇🏽link to lifted look @PDXXXX
I took a break from trying my hand at nose contouring - I’m being a little fussy about shades but I’m sure I can make something work with the bronzers and contour products in my stash. I just have to spend some time looking for something I like and also a brush. If / when I do, I'll post a brush and product combo to the Perfectly Paired: Share your favorite beauty tool & product pairings thread.
But, I have been spending more time contouring my jawline and while I’m still playing with different contour products, I’ve found THE ONE as far as brushes go for contouring my jawline.
The shape of the MAC 171 S just lends itself so nicely to dragging and blending the contour product along my jawline for that snatched!!! look, as well as for subtler, more natural contour.
I’ve been gravitating towards cream contour and mainly sticks though I have found success with a shade in the MUFE palette. Will post swatches another day.
Here's what I've found over the last couple of months to work for me as far as jawline contouring goes on my round face:
TIP/NOTES:
SEPHORA COLLECTION PRO Contour Brush #78
MAC 171S
Sonia Kashuk No. 179
Fenty Beauty by Rihanna Match Stix Matte Contour Skinstick Amber
SEPHORA COLLECTION Cream Contour Stick
DIOR Forever Skin Cream Contour Sculpting Face Stick
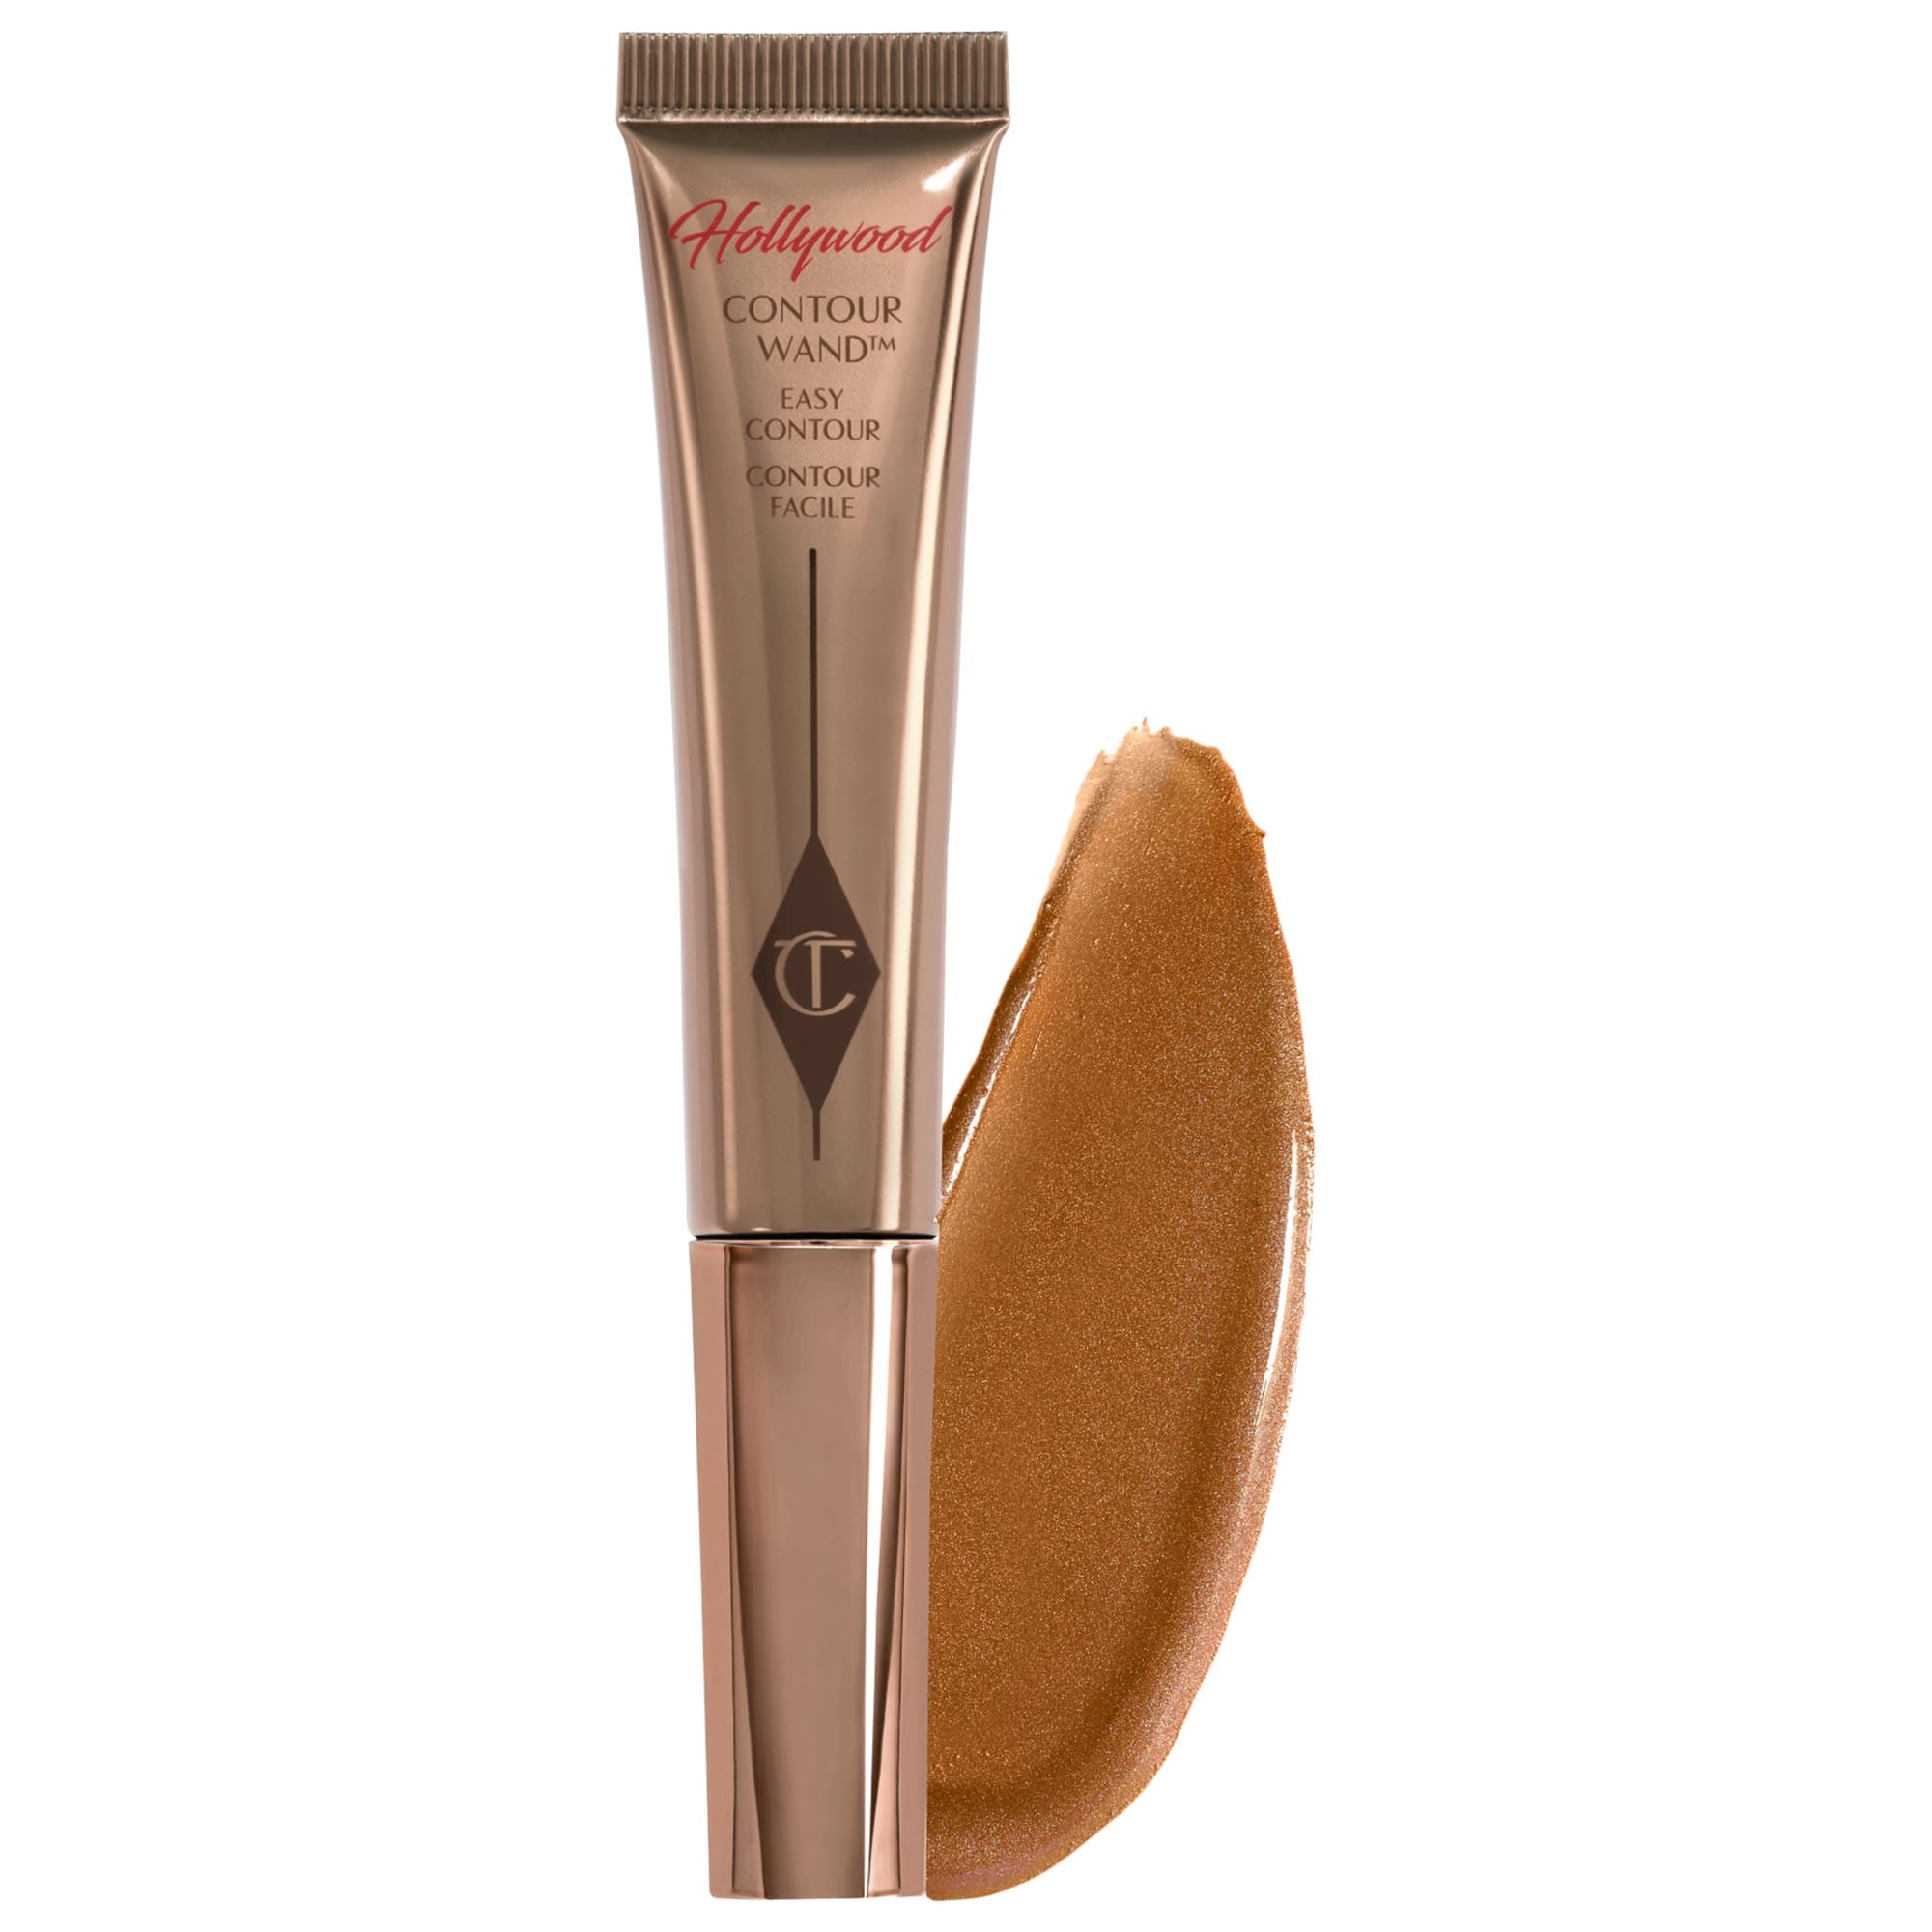
Charlotte Tilbury Hollywood Contour Wand
Victoria Beckham Beauty Contour Stylus
Catrice Magic Shaper Contour & Glow Stick
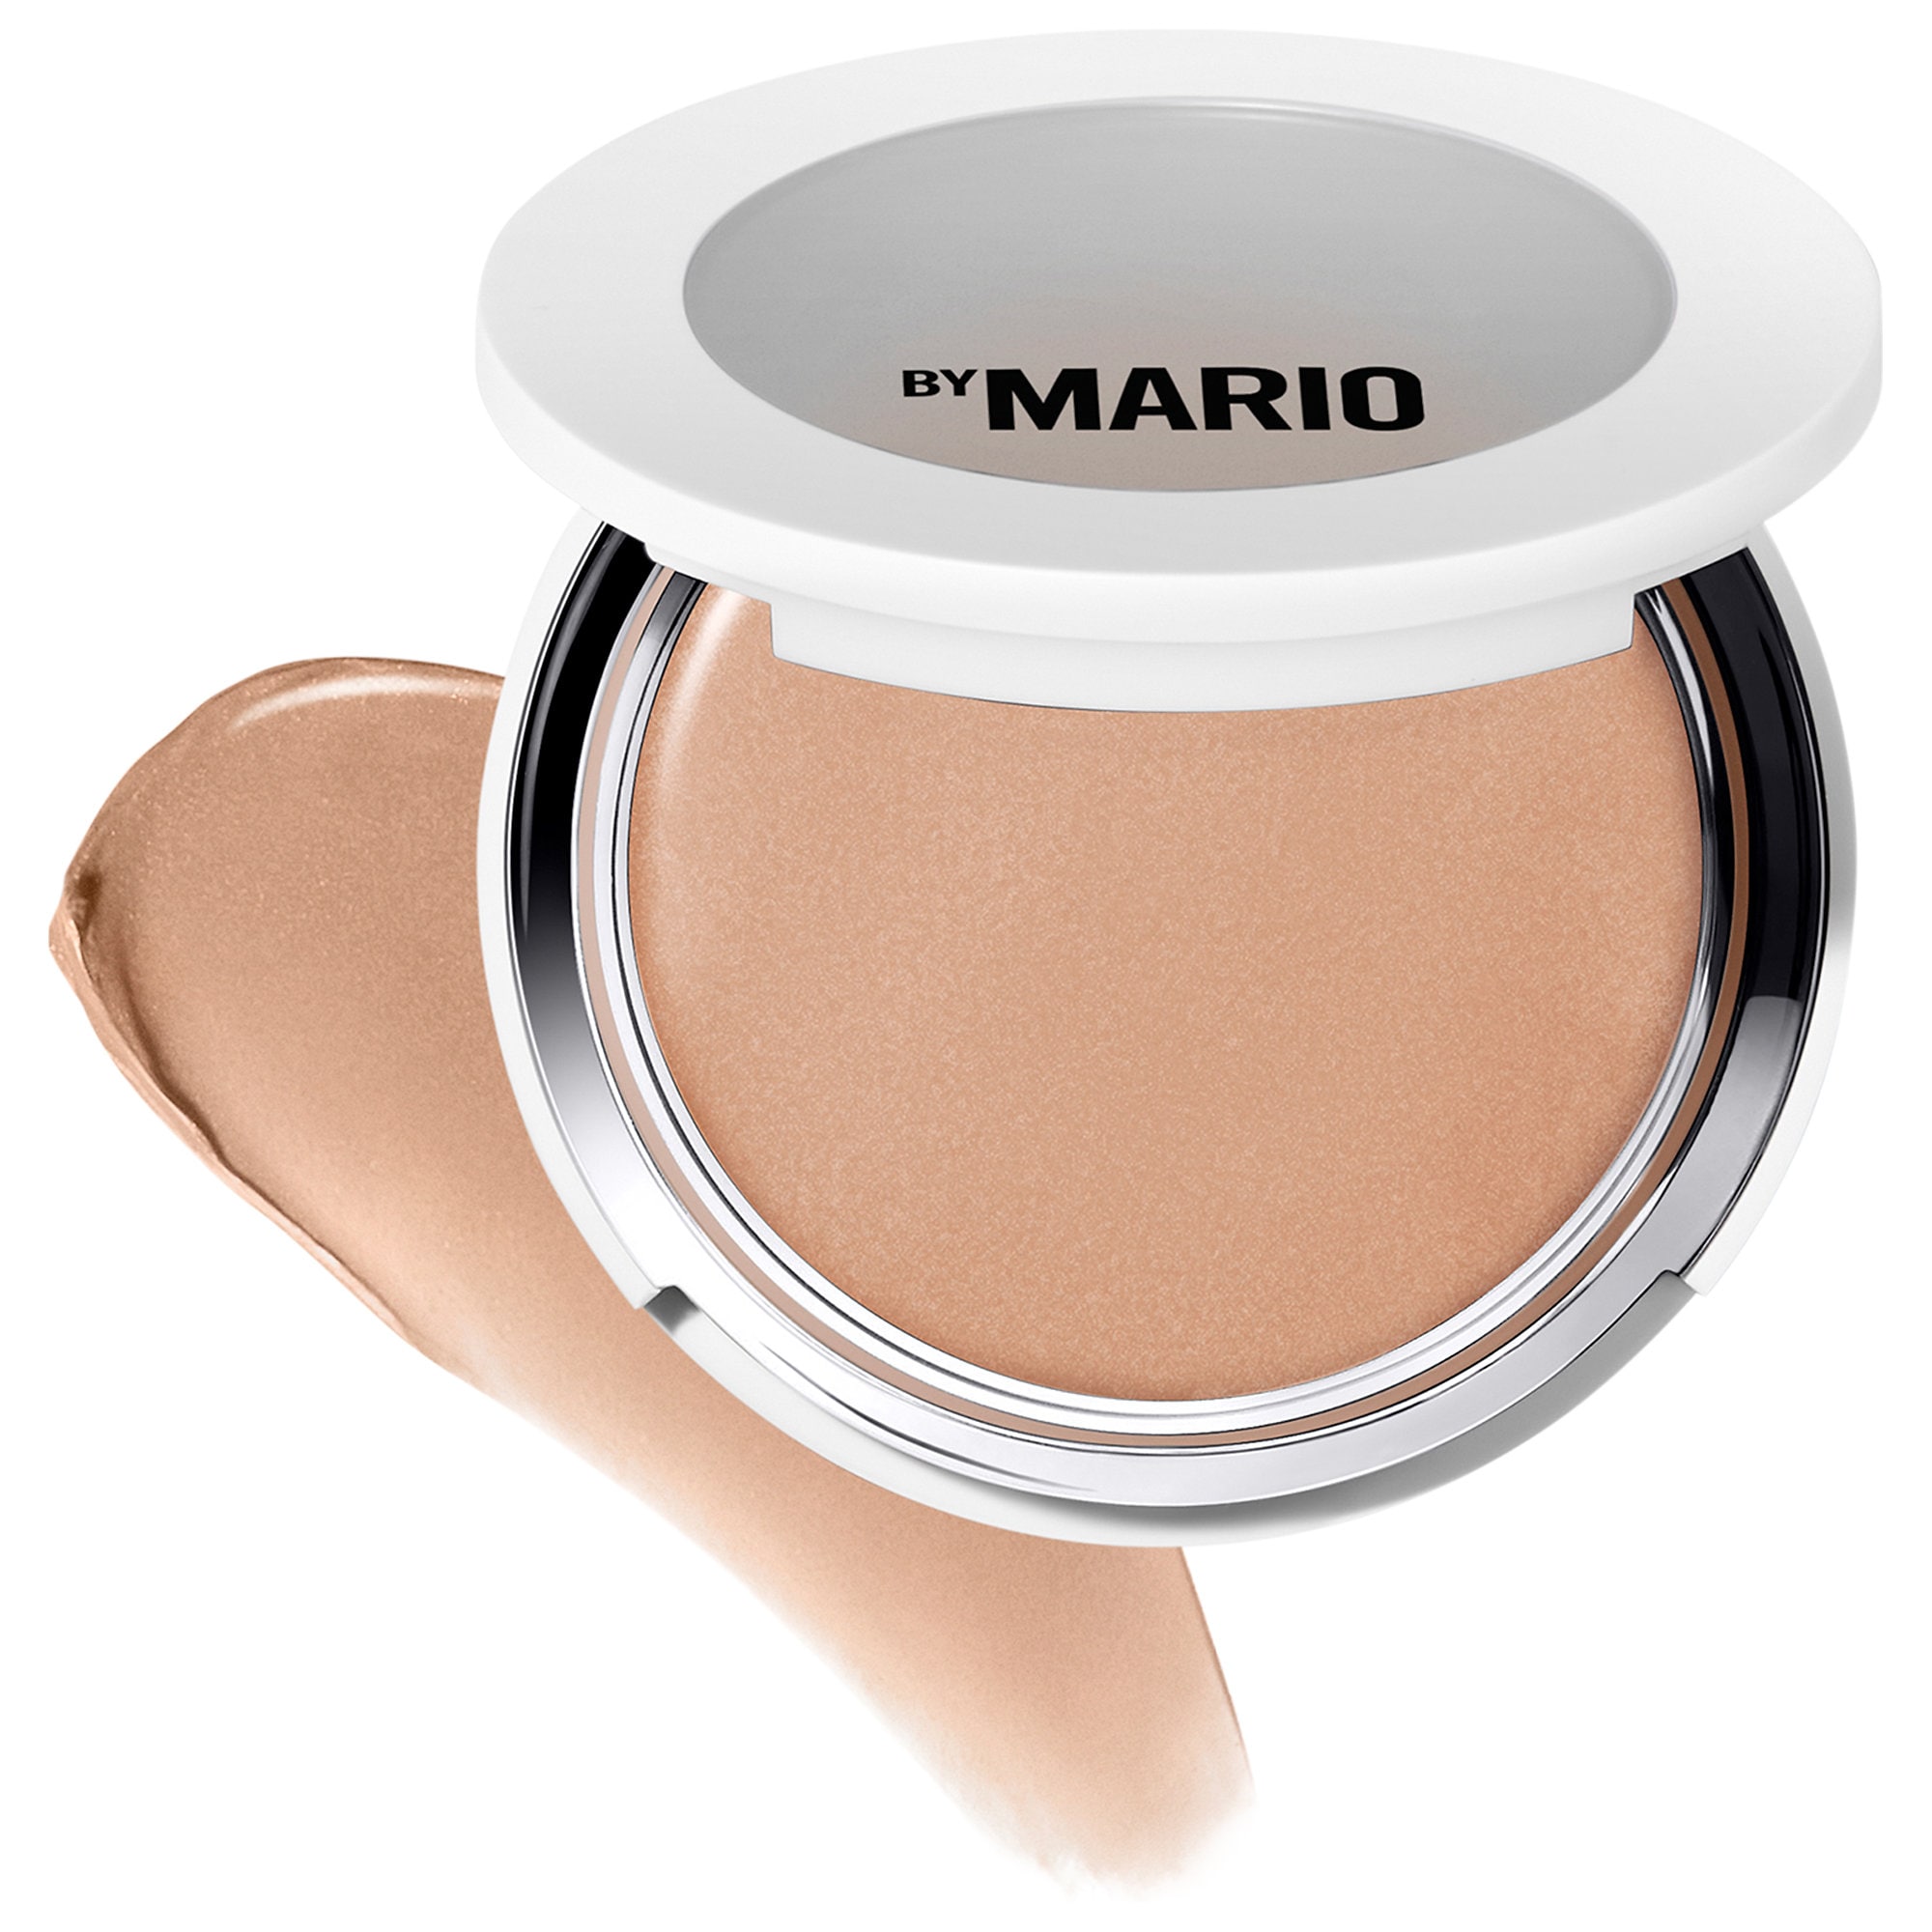
MAKEUP BY MARIO SoftSculpt Transforming Skin Enhancer® (excellent for underpainting)

I love your thought process. And.. .Oooh, that thread calls to me.. That might be the thread I "live in" @itsfi , that's a low-key obsession, product to tool matching... The forever hunt. Love it.
I love amber for lighter times and remember when it was released. That Mac brush btw 👀
I think I mildly fractured my nose last summer.. which at best is superficial and mildly detectable, so no worries..I have a little nose bump that I sometimes contour underneath. So, in a sense, I fracture my nose contour, maybe play with various thickness of contour lines? I think you asked if I like HAUS LABS BY LADY GAGA Precision Sculpt Shaping Balm Contour Stick Silhouette better than Fenty Beauty by Rihanna Match Stix Matte Contour Skinstick Truffle which I meant to answer, but probably for distracted, my bad .. They are equivocal since they have different purposes.
Truffle: warmer, mine is old so drier and harder to blend out, BUT, great in cheek area with various products and easy to use for inner eye corner.
Silhouette: very balmy, cooler, blends out much easier but requires going back to layer.. Which is why I think I went through it so quickly .
They both can be use precision wise, the HL is narrow and the Fenty, I just slant it, and it'll flatten out on a side.


Oh my gosh, move on in to that thread, girl!! 😃 I'd love to learn about what tool-product combo's your loving or trying out @danielledanielle!
Would love to hear from folks about what's working for them, but completely understand that may not be everyone's thing. At the very least, it'll be a space where I can catalog what I'm currently liking and get feedback from others on either what I'm using or recommendations for what they've tried and liked with that particular brush or product. And for others to be able to use it as a resource too would be awesome. I'm also hoping it will serve as a reminder of what I already have and in that regard, help to curb any knee jerk reaction to pick up another << name a tool or product, any tool or product 😂 >>
Yes, the forever hunt ... I mean, it's often a really fun hunt because there's a lot of really nice brushes out there! 😆 Ahhhh, this MAC 171S is quite good! Made this month's monthly faves. Hoping it's part of the MAC stock that makes its way to Sephora later this year.
I didn't think I'd be so finicky about my nose contouring shade but undertones are really becoming a sticking point for me of late, lol. I like the VBB contour stylo in that it's thin (even though there's not a lot of product) but the shade I was using was too warm, too goldeny-orange and too ... nope, not for my nose. 😅 I have the next shade, a darker, more cool toned hue that I'll try next, along with maybe the MUFE palette, Sephora Collection contour stick, and/or Dior contour stick. Going to pair them with the rephr spatula prototype and/or an eye blending brush. If none of those work out, I'll sift through my collection of Kbeauty or Jbeauty contour products. I've got options, which is great; I just need to carve out some time to practice and play.
You should be picky about it. @itsfi the wrong undertones can totally ruin a look that's was cohesive, but the right ones just make it so so so good. I started focusing more on highlighting towards the nose vs just the nose itself and the contouring became easier, but if I have something too warm, it gets muddy real quick.
Thanks for this info, @danielledanielle ! I might give the selfie a try out of curiosity. 🤗
@Titian06 , @CynthieLu It's pretty fun, I dug into my phone because I've been meaning to do this and used the highlight option to map.
Underpainting
End result
(If you don't want to post your face, feel free to keep the selfie to yourself, you can see if there are any face charts similar to you and post these instead) 👇🏽
https://stock adobe com/search?k=makeup+face+chart
Just add '.' where there are spaces
@danielledanielle @CynthieLu - I finally took a pic this morning. Trying to find an online pic was impossible. None matched where my hi- and lo-lights are. My loan highlight is a big blob right in the middle of my huge forehead. My shadows are right below my cheekbones, which is where I wear my blush. I should mention I have a square face. This may explain why when I wear my bronzer as blush, it always looks so good. 🤔
@Titian06 , interesting! You may have the hexagon face shape actually (or oblong?), and that makes perfect sense.
I think I'm oblong? But, also somehow oval? Am I....Obvlong...Heh. I sometimes use a white powder in the center to highlight my forehead and it works. Even if you don't have a lot of shadows, face mapping is just as much as about highlighting as it is shadows.
Thank for the visuals @danielledanielle it's very helpful. 🙏 I haven't attempted it yet but it's on my to do list to try.
Ooooh this is interesting @danielledanielle. You've been experimenting with this? I think I'm going to give it a try. I like the idea of using a selfie to help do the mapping. That's a good idea! 💡
Ooop, the master has beaten me to this 🤣
Danessa Masterclasses on the way, sign up on the direct site. You have to register/full out a form, but it's free!
There's also a class this Sunday, not sure if spots are still available.
❌ Posting to The Danessa Myricks Beauty Thread